
Legally Blonde called for a number of slow shakers and the Roland TD-30 “one shot” style sample wasn’t cutting it. So, I thought I’d take the opportunity to try creating my own shakers with items from around the house and sample them.
Here are a few things I learned in the process:
Filler
I built a few shakers using items I found around the house. I experimented with plastic, glass and metal containers and a wide variety of fillers including gravel, sand, rice, lentils and pasta. I liked the sound of Acini de Pepe pasta in a metal water bottle the best although some of others were good too.

The biggest challenge I found was building a shaker that would be loud enough to record with decent dynamic range (see Noise Floor below). In this case, it turned out that bigger was better and the larger water bottles gave more volume.
Noise Floor
To get clean samples, you need a low noise floor and this is tricky when recording something subtle like a shaker. I used Logic Pro X and found the MultiMeter plug-in to be very helpful in measuring noise in the system. Just load a MultiMeter onto your track and adjust the “Top” and “Range” settings to focus in on your noise levels. Record some silence and then loop it to get a view of what you are dealing with:
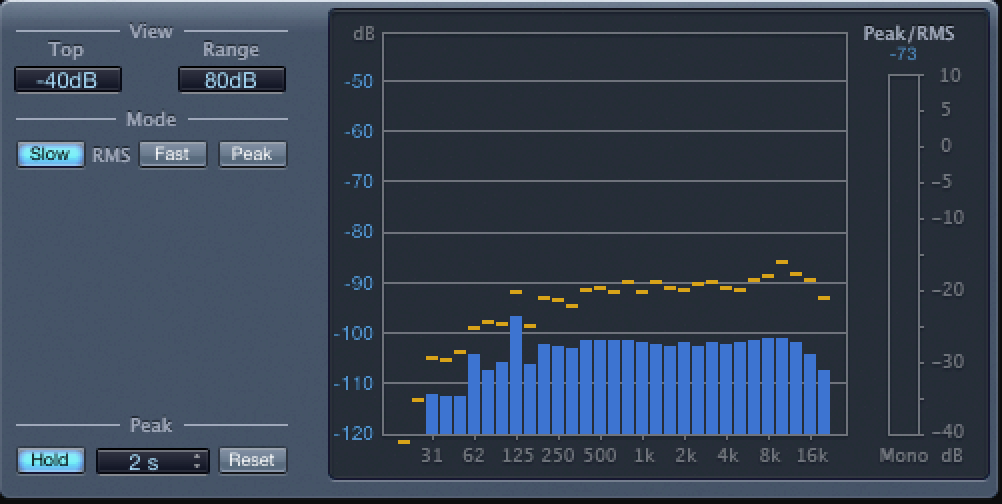
Once you can see the noise levels, experiment with preamp settings, dimmer switches, placement of computers, kids, pets, etc. until you minimize noise. One of the best recent additions to my signal chain has been the Furman AC-215A power conditioner. I’ve been battling ground loops and various noise problems and found that these have cleared up my signal tremendously. Note that you need to have everything connected to the same line conditioner to get the benefit – plugging a sound module into one and its speaker into another will not fix your ground loop problems.
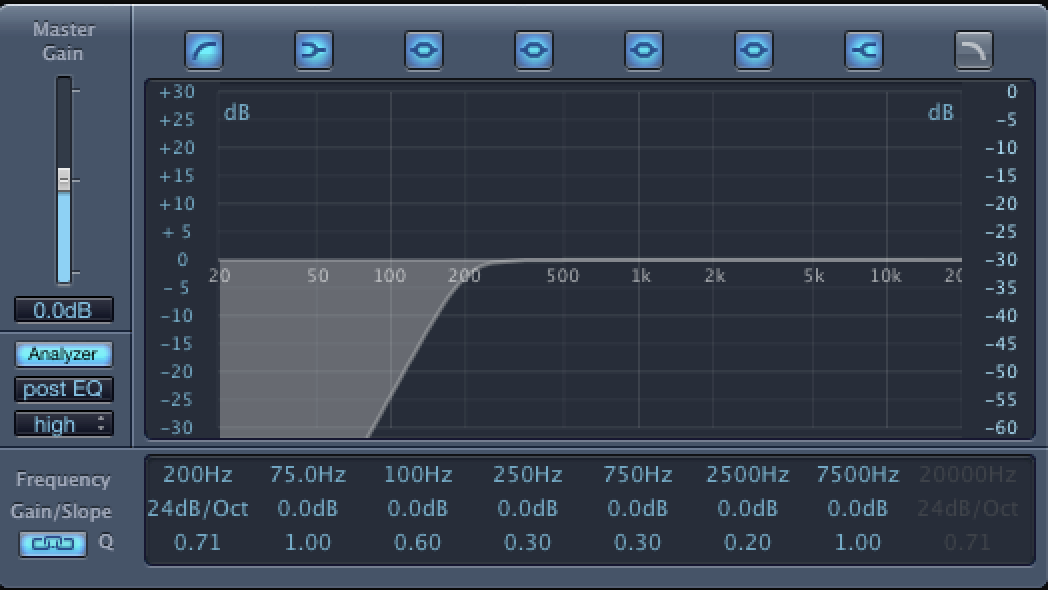
Also, be sure to roll off the low-end (e.g., 200Hz and below) as a lot of noise is going to reside there and you won’t want that in your signal.
Shakin’ It
I experimented with a few different shaking techniques and settled on moving the shaker toward / away from the mic. It didn’t really occur to me until I started listening carefully, but the shakers you hear typically have a slight doppler effect from their motion toward and away from the listener and this motion re-creates that sound.
EXS24 Sampler Instruments
Before I started in on the sampler instrument, I bounced my recorded samples to a new track to burn in the EQ settings, apply a noise gate to remove noise between samples and normalize the track. I then right-clicked the track and used the slick Convert To New Sampler Track function to get a starting point. Be sure to select Create Zones From : Transient Markers in the pop-up window that comes up. However, note that there is a bug in the transient processing where each sample runs right up to the next transient adding unwanted pops/clicks to the tail of each sample. You just have to go through and trim the sample regions to have a short, clean tail.
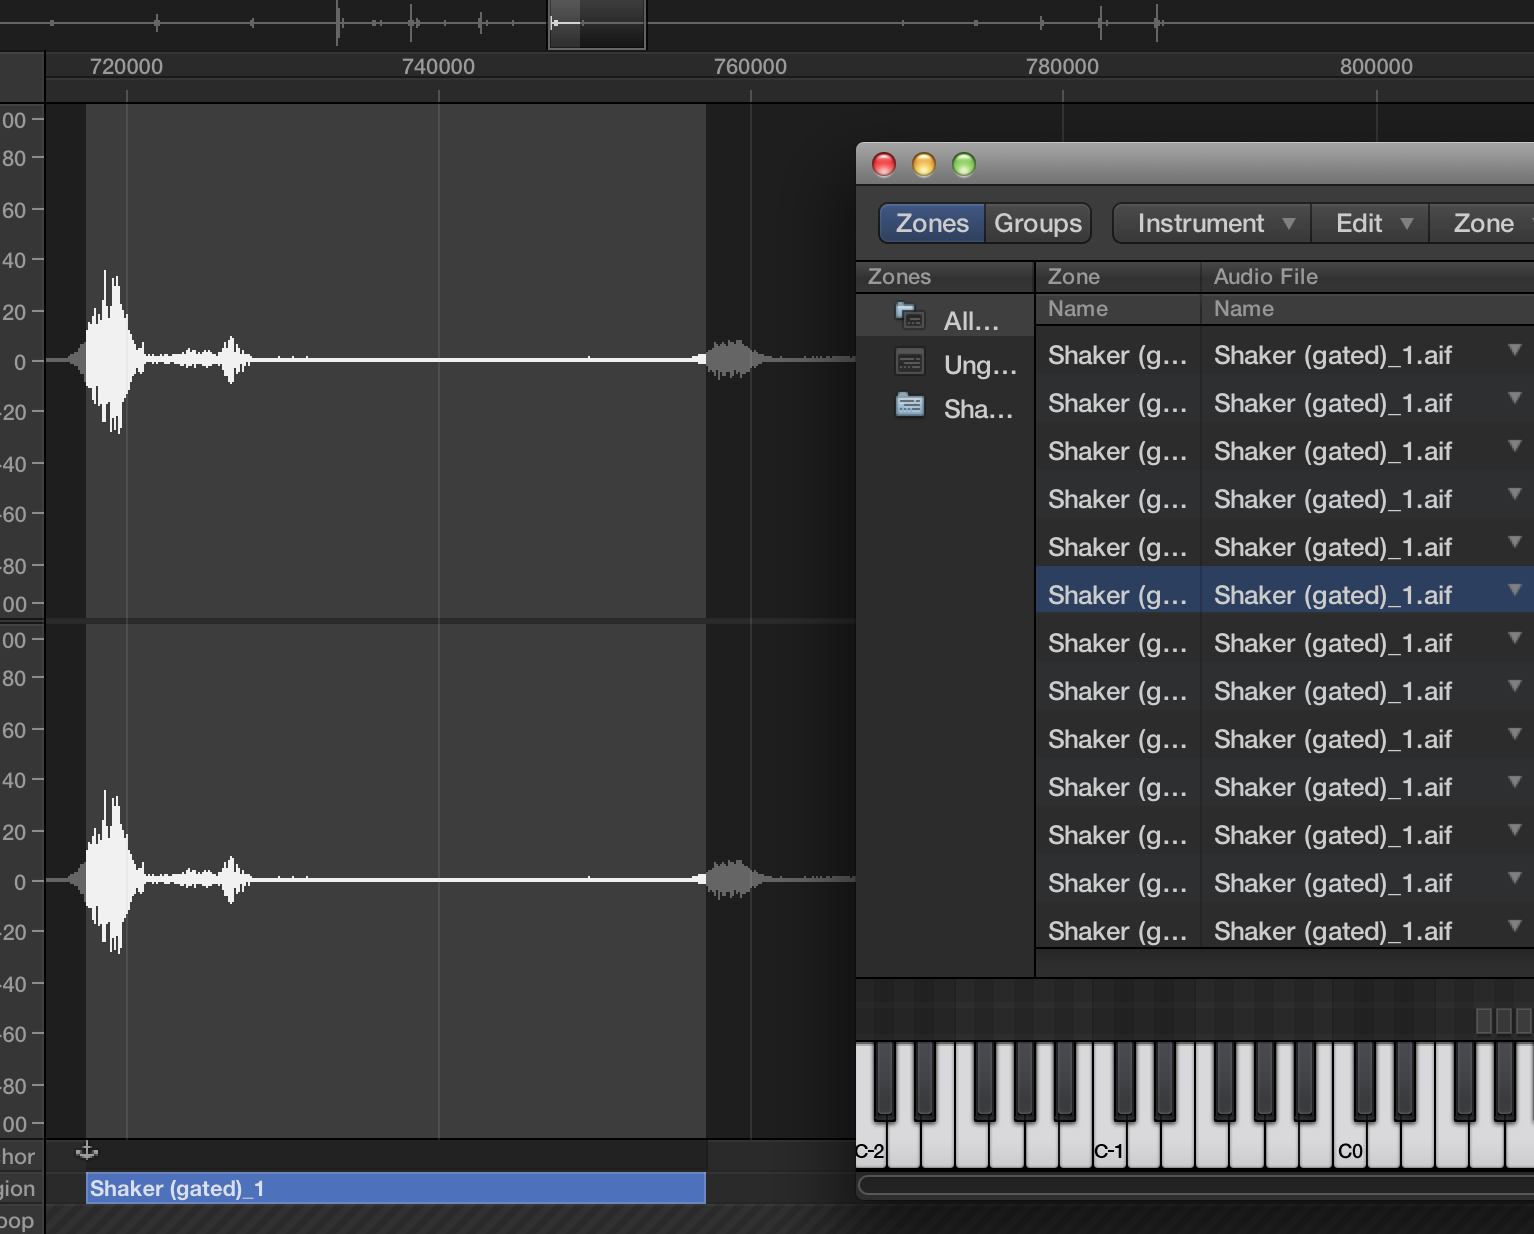
From there, you can construct your sampler instrument and there are lots of great tutorials on the web to show all of the detailed steps.
Results
I ended up with a decent collection of shaker samples and created a few EXS24 sampler instruments that I used in the show. I was able to create some nice velocity layered patches with round robin samples to recreate the slight doppler effect from a real shaker. I wish the EXS24 editing UI was a bit easier to use, but it did manage to get the job done.
The live setup was quick and easy using the TD-30s USB port to send MIDI and receive audio from MainStage.
Take a listen to the results:
